Gallery

Play Prop – Newspaper

My son was involved with his school’s one act play competition and he asked me to make a prop for it. This was fun as I got really silly with some of it, but the front and back (aka the parts when the paper is open and facing the audience) I had to make sure fit the play of course, but I still had a bit of fun with it, as even following the prompts still gave me a lot of room to put my own spin on things.

The play is called “The Perfect Ending” if you want to look it up. There are two versions of the paper – this isn’t in the script – my son and his teacher decided it would be funny if someone grabbed the first paper out of his hand and his character pulled another one out of his pocket. So, I made the other one so they can have this added bit of improv to make their performance unique.

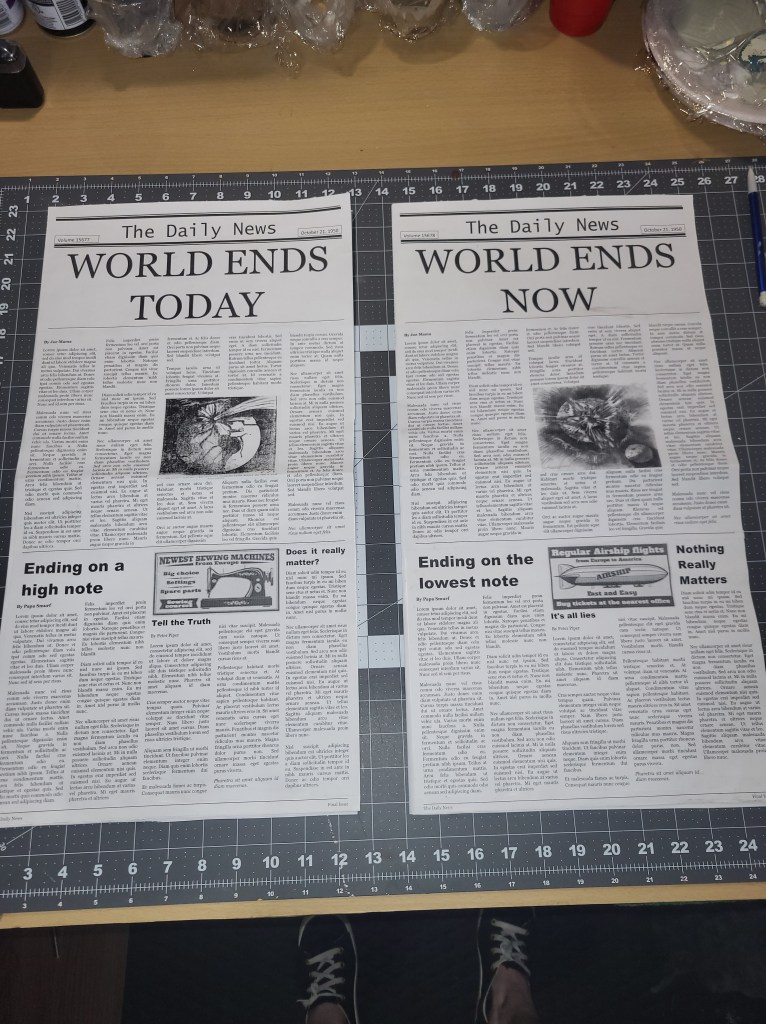
I used Lorem Ipsem text for every article – which is just filler text that are not real words but made to look like it so you’re brain is tricked to thinking it’s normal text – spacing, word length, etc. All the article headers I made, trying to fit with the theme of the headline. The ads I just googled newspaper ads and saved a few I liked the look of.

The inside is where I went really silly with it, as no one in the audience would see it enough to read any of the titles, but it sill had the look of a paper to make it a completed prop. Again, just filled with Lorem Ipsum text and random pictures I found on google. The inside of both versions of the paper are identical, again just for show.

I did a rough layout in Microsoft Word, printed out the pieces, then glued them all together. Easy peasy.

I had plenty of giggles while making this and I loved that I could make it for my son and the play.

Alice in One-derland Party Decorations

This was one of the biggest projects I’ve ever done this far. I had an absolute blast. My ‘boss’ (she hates being called that) at work asked me to make decorations for her nieces one year birthday party. She had a long list of things and I tried my best to make everything she wanted. The only thing I didn’t get a chance to make, as I ran out of time, was the Mad Hatter’s hat that was to be one of the centerpieces.

These 3 were made of 1/4″ birch wood then painted. The caterpillar was my favorite of these three for sure.

Large pocket watch. The lid and body were a plastic platter from the dollar store, while the used the 1/4″ birch wood for the clock face. I decoupaged the flowers on the inside of the lid (from a napkin), stamped the two flowers on the face, and used my cricut machine for the words, numbers, and clock hands. The “hinge” is actually some heart shaped buttons put together and the wind at the top is made from a small wood piece and metal loop I had.

These came out so cute! I used foamboard for their bodies, feet, and heads. All the designs and their faces were made with card stock. Their spears are wooden dowels & foam board. (Excuse the painting mess in the background! I finished these before the painting was done for the rest of the project.)

The sign post – my wonderful hubby built the stand for me. He used a 2×2 and some 2x4s. I then stained it before attaching all the signs. The top round is actually a canvas and all the arrows are 1/4″ birch wood. The roses, keys and locks on the sign are actually stickers I found at the dollar store. I used my Cricut machine for the letters and to make the stencil to paint the checkered pattern on them.

THIS is my absolute favorite and the last thing I finished. I am SO excited with how this came out – it’s beyond my expectations. Started with 1/4″ birch wood, primed, then traced the door frame onto it. I gave a little dimentions with the door frame with foam board (which I also painted before gluing onto the wood base.) The hinges are made from a old place mat, styrofoam balls, and bamboo sticks. The doorknob is 1/4″ birchwood. His “nose” is honestly the best part to me – I had the worst trouble finding something that would work. Couldn’t find an actual door knob. Ended up using a racket ball and painting it! I bought the curtain rod but the curtain I sewed myself from some red fabric. Then held it open with a red ribbon. Of course, the text was done with Cricut machine. I’m serious when I say, I love this door. I’d keep it for myself if I could!

Mjolnir Build

My family are big Marvel fans – so of course when my son asked for me to make Mjolnir, I said absolutely. This was a challenge as the hammer has a lot of intricate detail, however, I think I pulled it off quite well! My son is very happy with it. I plan to make a “stand” or “holder” for it, so that it looks like it’s embedded in dirt (like in the first Thor movie) but that’s for another day!

Made it cardboard (layered to make it sturdy), foam, and my Cricut machine. I looked up the specs for the official Mjolnir in the movies. This one is just a few millimeters bigger, as in the process of making it, I had to add another layer of foam to fix some errors that happened during construction of the pieces.

Vow Renewal Party Project

My husband and I decided to renew our vows this year. 17 years together! So, that meant a lot of party planning – and decorations to make! We love the Ocean’s 11 movie, so we had a Casino Night and got all dressed up! It was an absolute blast, full of love, family, friends, and tons of fun. The decorations were stressful as I wanted everything to be utterly perfect, but in the end, they turned out great.

I made the centerpieces, the koozies, and more. I made shirts for our “Girls Day” out (since I wasn’t a bachelorette – I never had one, so we had a Girls Day instead.)